Precision is the key to fine woodworking. When making cuts, your equipment can determine the outcome of the final project and whether you consider it a success or failure.
Finding the best miter saw for your needs is the most important step in your woodworking success, whether you are a beginner or a seasoned expert. We have tested miter saws from the top brands and provided miter saw reviews to help you find the best equipment for your needs.
Best Miter Saws for 2018
When purchasing miter saws, there are a few differences from purchasing other saws.
The features and type of saw that you need will depend on the type of projects that you intend to do, your experience level, and whether you do woodworking as a hobby or as a professional.
This comparison table will provide you with an overview of the major features that will be discussed later in our Buyer’s Guide.
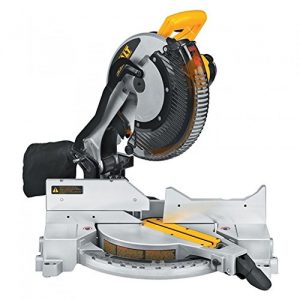 DEWALT has been making dependable tools since 1947. The DEWALT DW715 is a single bevel compound saw that, in our opinion, gets the award for the best overall performance. When you are making the cut, this saw feels amazingly smooth and solid.
Even though the saw is only a single bevel, we still think that is the top pick because it makes cutting through even the toughest hardwoods feel like cutting through butter. When it comes to miter saws, it is all about the precision of the cut and the final product. This is where we think this model shined.
Some saws tend to fight you when it comes to setting your angles. Saws that do not lock in place securely can be frustrating at best. In addition, we have tested saws where something is slightly off square and you will never be able to make the quality cut that you want. This is not the case with this DEWALT model. Everything is square and tight, which gives you the control that you need when doing fine woodworking.
The DEWALT DW715 feels powerful and rotates at up to 4000 RPM. The base is sturdy and flat. Another important thing to look for is whether the fence is solid and level. If either of these things do not hold true for your saw, then you cannot make accurate cuts. DEWALT quality shows itself in this respect for this saw.
The only thing we didn’t like is that the dust collection system is not the greatest, but it is difficult to find a miter saw that excels in this aspect. This means that you have to clean up your shop often when making cuts. A good shop vac can easily do the trick.
This saw may not have a lot of features, which means that it is more affordably priced. However, having a lot of features and a higher price does not necessarily make it a better saw. It is the performance and precision that counts. These are the main reasons why we ranked this as the best overall miter saw among those that we reviewed.
Pros
- 15 amp motor delivers plenty of power
- Lightweight and easy to transport
- Fence and gauges that are easy to adjust
- Accurate and precise cuts
- Sturdy and stable construction
Cons
- Not the best dust collection system
- Not compatible with DEWALT lasers or LEDs
- List item
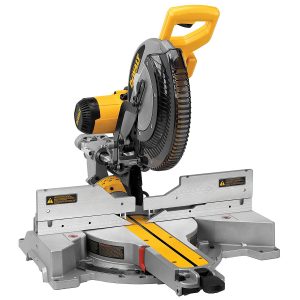 If you are going to be cutting wider pieces of lumber and crown molding, you need a sliding compound miter saw. Of course, they are a little more expensive, but if your job entails cutting wider baseboards and materials, then it is well worth it.
We like this sliding saw because it is designed to be versatile enough to handle a wide range of board types due to its unique back fence design. It has a high fence that supports the wood solidly when making a cut. This is important when cutting wider pieces of crown molding. A sliding compound miter saw is almost necessary when you are making cabinets and need to cut 12-inch wide shelves on a regular basis. The DEWALT DWS780 can do the trick and make it look easy with its powerful 15 amp motor that can achieve 3,800 RPM.
What truly placed this model above the other sliding compound saws that we reviewed is its stability and sturdiness. The locks were easy to operate and held securely once tightened down. This allowed us to make precise cuts that would be good enough for high quality furniture making. There are a few saws that can meet these high-performance standards.
Another thing that we liked about the saw is that you can buy special blades that will allow it to cut some types of aluminum and plastics. This expands its capabilities and range of usefulness even further. This saw also allows you to manually override the 45-degree setting. You can fine tune the bevel angle using this control.
This model also has a depth stop that limits the cutting depth of the blade and allows you to create grooves with accuracy and precision. Of course, this saw is a little bulkier and takes up more space than non-sliding models. We also felt that the dust collection system could be better
We felt this was the best sliding compound saw for both hobbyists and professionals because of its wide range of capabilities and the quality behind the DEWALT name.
Pros
- Can handle wider lumber and materials
- Miters 60 degrees to the right, 50 degrees to the left
- Stable and precise
- Depth stop for cutting grooves
- Work light to help you see your line better
Cons
- Heavy and takes up more space than a non-sliding model
- Dust collection system lacking
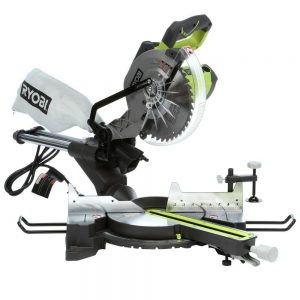 The Ryobi 10-inch Sliding Compound Miter with Laser is a precise and powerful saw that would have placed higher if it had more features and capabilities. It has settings that can handle standard molding angles, but it is not as versatile as its competitors. For the price, it is a good value and an excellent saw for beginners.
The operation of the saw feels solid and it cuts very quickly. The sturdy detents and laser sight make it easy to make precise cuts. This was one a few saws that had a dust collection system that we felt worked as it should. It worked best when the port was connected to our shop vac.
The slide has smooth operation and is precise. Overall, it is a good solid saw that can handle miter ranges from 45 degrees to the left and 50 degrees to the right. This is enough to accommodate most of the common cuts that you will need, but professionals who do woodworking or furniture making may want to have a wider miter range. One thing that we did like is that the detent bypass is operated by an easy to operate quick action lever.
Another thing that could be improved is that the blade that comes with the saw is not the best quality, and for us it wore out very quickly. This is not problematic because better blades are easily obtained. Another thing to note is that the laser system is difficult to see outdoors in the bright sunshine.
This saw has many more good qualities, especially if you are a hobbyist or beginner. This saw would be a good place to start.
Pros
- 1-1/4 inch dust port that can connect to a standard vacuum hose
- Adjustable laser guide for accurate cuts
- Electric Brake for extra safety
- Powerful 15 amp, 4,800 rpm motor
- Lightweight at 35.84 lbs.
Cons
- Laser system difficult to see outdoors
- Blade that comes with it is not the highest quality
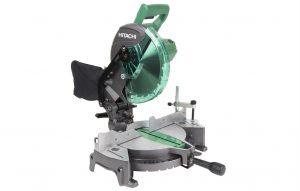 We found the Hitachi C10FCG to be a good saw for DIYers and hobbyists. The saw has easy to operate positive stops that allow quick adjustment. One of the things that we liked about this saw is that it has a wide miter cutting range from 0-52 degrees both left and right. It has a bevel range of 0-45 degrees left. This gives you the ability to do more than most lower-priced saws.
What impressed us most about this saw is that Hitachi managed to tweak the motor to deliver 5,000 RPM at 15 amps. This is a high number of revolutions per minute and creates a clean cut end. When doing fine woodwork, this will allow you to make precise joins. This saw allows you to create high quality work with a saw that will not break the bank.
We tested this saw on a number of different materials and found that it was able to cut hardwoods, fiberboard, aluminum sashes, plywood, and decorative panels easily. This saw also comes with an extensive list of accessories that allow you to expand its capabilities. You can start with the basics and then add on as your capabilities and needs grow.
This was one of the lightest weight saws that we tested at 24.2 pounds. This makes it easy to transport to the jobsite or work area. Hitachi managed to keep the unit lightweight but provides a large and stable table. Even though it is lightweight, we felt that it was one of the most solid units that we tested.
The main reasons why we liked this saw as one of the best miter saw models is that it provides greater capability in cutting angles for the lower priced saws. It also features a handle that is easy to grip and provides a secure hold. We felt this was a good saw that balances flexibility and quality.
Pros
- Easy to operate positive stops
- Large, stable table
- 15 amp, 5,000 rpm motor
- Miter range from 0-52 degrees, both left and right
- Wide single bevel range from 0-45 degrees
- Many accessories available
Cons
- Dust collection system may not be the best
- Limited in the board sizes that it can handle due to fence design
- Six-foot cord is a little short and will require an extension cord
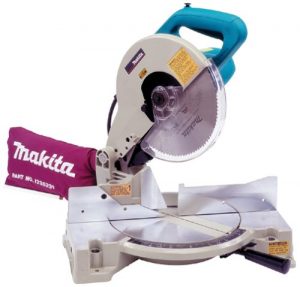 The Makita LS1040 is by far the best saw for beginners and a great way to break into woodworking. Many lower-priced saws are difficult to operate and have adjustments that can slip while you are cutting. This can be frustrating for beginners, but this will not happen with this saw. The adjustments on this saw are firm and allow you to make precision cuts.
The design of this saw is simple and easy to use. It is also a great lower priced unit, which means that you do not have to break the bank if you do not foresee yourself using the saw more than on an occasional basis.
We felt this was a solid saw made from quality materials. This saw has a non-sliding arm which makes it stable. It also has a great fence design that allows you to easily keep the wood solid when making a cut. This not only allows you to make a precise cut, it is also one of the main reasons why we ranked this as the best saw for beginners.
Makita is known for making solid, but simple power tools. We think that this model represents their brand well. Professionals may want to model with more options for adjustment, but this tool was made with the beginner in mind.
We found the adjustment settings to be accurate. The high rpm motor will allow you to make cuts that need very little sanding before assembly. A non-sliding saw does not give you the same range of capabilities as a sliding model, but they are also more stable, making it easier for the non-professional to make accurate and clean cuts. Too many moving parts on a sliding saw can be overwhelming for the beginner and they may lose interest in their hobby before they get started. This is why we suggest a non-sliding saw for those who are less experienced.
When combined with a good blade, this saw should get you through most projects for hobbyists and DIYers. The ease of use and simplicity of this saw will encourage beginning woodworkers to continue to build their skills and become devoted woodworkers.
Pros
- User-friendly design
- 15 amp, 4,600 rpm motor
- Well-designed fence
- Stable machine
- Great for beginners
Cons
- Unimpressive dust collection performance
- Not as many adjustments available as on other saws
- No matching stand available
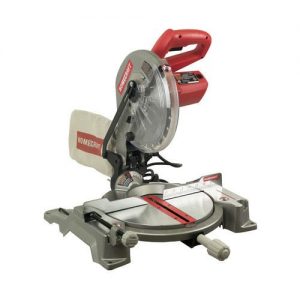 HomeCraft is known as a maker of reliable power tools designed for the home user. With this model, it performs better than other saws in its class and may even surprise the professional.
In terms of the accuracy and precision of the saw, we were impressed because it performs as well as some higher-priced models. Of course, at this price range, you would not expect to have as many amenities and features, but if you are looking for a high-quality tool, we think this one fits the needs of most.
One of the things that impressed us most about this saw is that it only uses a 14 amp motor, where most saws use a 15 amp motor. However, this saw achieves a higher RPM than saws with larger motors. This saw can turn at an impressive 5,500 RPM. This company was able to achieve higher revolutions using less electricity. What this means for the user is that you can make cuts that are clean and do not require a lot of hand sanding and finishing. In this respect, this model works more like a professional saw than one designed for the home user.
This saw has a built-in laser that will help beginners make precise cuts. Positive stops at standard molding angles allow even the beginner to accomplish most weekend projects. You do not have to be an expert woodworker to make your remodeling job look like a professional with this saw.
One of the features that we liked about the saw is that you can turn the laser on or off, instead of being on all the time. We also like the speed of the electric brake stop and its ability to stop the blade within a few seconds of releasing the switch. This allows you to react quickly to any situation that arises.
This model does not come with a stand, but it works with almost any miter stand available. You can easily find a stand that will work perfectly. This saw is compact and does not take up much space, yet is as stable as heavier models.
We thought this was one of the best compound miter saws because it combines professional performance, yet it combines a design that makes it easy for the nonprofessional to use. We liked that it was light weight yet sturdy and performs like a saw with a much larger motor. For these reasons, we think this was the best value among the compound miter saw its that we tested.
Pros
- Good for home user
- Built in laser for precise cuts
- Light weight, easy to move
- Standard positive stops
- Quick acting electric brake
Cons
- Does not come with stand
- Not as many capabilities as higher priced saws
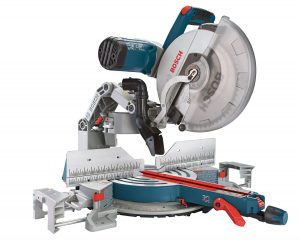 Bosch has earned a reputation for producing that perform reliably and that have more features and options than their competitors. Their products combine innovation with value. You also pay for this performance, so it is important to know how the tool stacks up to its competitors.
First off, let’s just say that Bosch uses stainless steel, where their competitors use aluminum. They also have easy to read markings. Stainless steel miter scales create the ability for accurate miter angles that will not wear out over time.
This tool was one of the easiest to operate with bevel controls located upfront. The range selector is in front, which means that you do not have to reach behind the saw to make adjustments. We also liked that he has an ambidextrous trigger handle and soft grip Bosch took the time to incorporate ergonomic design into the operation of this machine. This machine was designed for someone who intends to use it for long periods of time during the day.
This saw was one of the most compact models that we tested and has a small footprint. However, this being said, it is a little on the heavier side at 65 pounds. However, this weight also gives the machine a tremendous amount of stability. Compact machines have a tendency to become less stable without this extra weight added. The extra weight comes from using stainless steel parts that will last longer instead of lighter weight aluminum. The weight stands as a testament to Bosch quality.
We thought this saw could use a little more power because it only turns at 3,800 RPM. This made it a little tough to get through dense hardwoods. However, for softer woods and common materials such as plastics, it worked fine.
This was one of few saws that we tested with a dust collection system that seemed to work.
Bosch quality could be seen throughout this model. You always pay a little more for Bosch, but it is well worth it. You pay for better materials and attention to design details, such as comfort and ergonomics. We thought that Bosch hit it over the fence with this compact miter saw.
Pros
- Smooth Glide
- Precise, easy alignment
- Stainless steel miter scales
- Small compact footprint
- Ambidextrous trigger
- Ergonomic Design
- High quality materials
Cons
- Could use a little more power
- A little heavy to move
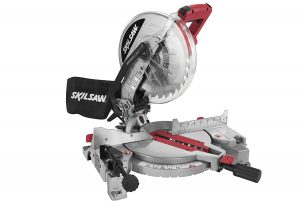 SKIL is a popular brand name among professionals of many types. However, they focus on light weight, easy to use designs that are perfect for beginners too. There controls are intuitive and easy to use. It is easy to assemble and will allow a beginning woodworker to grow in their experience with a saw that will last for many years.
This saw is lightweight and only weighs 25 pounds. It has helpful laser guides that allow you to easily see where the cut will be made. It also has extra markings on the fence to help you make certain that things are aligned properly. This means an accurate cut every time.
This saw has a 15 amp motor with a 5,000 RPM operating speed that allows you to make precise, clean cuts with little effort. It also has nine positive stops for quick, easy setting. It also has carbide tipped and titanium carbide blades available.
SKIL specializes in equipment that is durable and long-lasting, yet lightweight and easy to use. However, we felt that the blade that came with it had a little to be desired. It quickly wore out when using it on tough hardwoods. This should not be a problem because you can easily find carbide tipped titanium blades that are much stronger and will be longer-lasting. This saw was intended for the home user who will not give the saw the same wear and tear as a professional.
We found that the SKIL 3317 is ergonomically comfortable and easy to use. It also has an extended miter range that can go to 47 degrees, both left and right. This allows you a little more versatility than similarly priced miter saws.
This saw actually surprised us for its price range. It may not be as feature packed as pricier models, but it is enough to get the job done for most home needs.
Pros
- Lightweight at 25 pounds
- Laser guides that are easy to see
- Extra markings on fence to keep thigs straight
- 5,000 rpm operating speed
- 9 positive stops
- Durable and sturdy
Cons
- Blade that comes with it does not last long
- Dust collection system does not work well
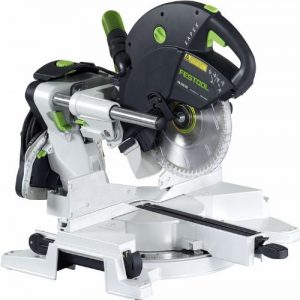 The Festool 561287 Kapex KS 120 is another miter saw that we feel needs to be included in the top 10 list because of its superior performance. This tool has enough capacity and features to handle most jobs around the woodworking shop. Sliding compound models may be a little more difficult to use for beginners, but for the experienced woodworker, they allow flexibility and to tackle a wide number of jobs.
This tool stands apart in its operating smoothness, cutting accuracy, power, and ease of setting. Frankly, I think that it places above some of its more expensive competitors in terms of its accuracy and quality of the cut.
One of the problems with sliding compound models is that they tend to wear out and after a certain number of uses they no longer cut straight. This was not the case with Festool. After checking the angle for accuracy at the most common positive stops, it was just as accurate as the first time it was used. This means that the knobs will hold up to heavy wear.
Compared to other saws, it seemed that the Festool experienced a drop in RPMs and slowed down when we tried to tackle extremely dense hardwood. Every motor will do this, but this one seemed to do it a little more than the others that we tested. We think this one could be improved by adding a little bit more power to the 14.5 amp motor. This is one of the reasons why we could not place this saw higher.
In terms of ease of operation and simplicity, this is a great miter saw. We felt that the fence and table of this saw make it easy to keep your boards steady and straight. This saw placed in the top 10 because of its ergonomic and simple to use features, but we felt that it could be a little better in terms of power and performance.
Pros
- Consistent accuracy over time
- Ergonomic design
- Simple to operate
- Well-designed fence and table
- Laser guides easy to use
Cons
- Could use more power
- Not as many features as other similar tools
- A little heavy and awkward to carry
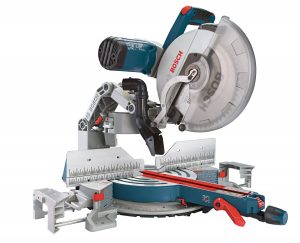 It is not surprising that Bosch made the list twice because of their superior engineering and design. We really think that this one is worth mentioning because it uses a different design than other sliding miter saws. Bosch designed its model with hinged arms that do not protrude behind the saw, which allows it to need less space behind the saw to accommodate the rails. This technology is a breakthrough in miter saw design.
Bosch used its popular ergonomic design with the bevel controls in front. You do not have to reach behind the saw to adjust the settings. We did think that it could use a little more power. It’s 15 amp motor only achieves 3,800 RPM. This caused it to bog down and cutting through dense material.
This machine makes accurate and precise cuts. We think that it has many excellent design enhancements, but they need to follow it up with more power and a motor that can handle the job.
Pros
- Smooth glide system
- Bevel controls at front of saw
- Can be stored against wall with no rear clearance needed
Cons
- Minor assembly necessary
- Slower emergency brake than other saws
- Could use more power
Miter Saw – Buyer’s Guide
Now, you have the best miter saw reviews to help you choose your next tool. When it comes to miter saws, the more features it has, the more expensive it will be. The three types of miter saws are standard, compound, and sliding compound. Understanding the capabilities of each miter saw type will help you choose the best one for your needs. A miter saw is mounted to a fixed base with a blade mounted on a pivoting arm. The arm can pivot horizontally 45 degrees to the left or right. Its most common use is making miter cuts, but some are set up to do 90-degree cross cuts too.
First, let’s get one thing out of the way. Sometimes people will refer to a miter saw at the chop saw, but they are not the same thing. The chop saw does not have an arm that pivots and it can only do one type of cut at 90 degrees. Miter saws can do this and more.
- Standard Miter Saws. A standard miter saw is the simplest form, if the only thing you want to do is make perfect 45 degree angle cuts. They do not have many features, but they are the most affordable.
- Compound Miter Saws. A compound miter saw can make an angled miter cut and a bevel, which is a sloping cut. The arm allows the blade to both swivel and tilt on an angle. It is possible to make a miter cut that is beveled too.
- Sliding Miter Saws. The next level is a sliding miter saw where the arm is not fixed to a certain location. The arm and blade move along a sliding mechanism. It can do everything a compound miter saw can do, only the blade can move in and out as well as up and down. This allows you to work with lumber that is wider. Of course, this is the most expensive of the three types because of the added features.
Basic Features of Miter Saws
Now that you know the three basic types of miter saws, it is time to become familiar with the parts and features.
One of the terms that you will run into is single bevel and double, or dual bevel, miter saws. A single bevel miter saw can tilt either to the left or the right, but not both. A dual bevel can tilt both left and right.
Miter saws are designed to have setpoints at standard molding angles. Some have more setpoints, called positive stops, and can be adjusted to make precision angles, but they should at least have points at 15 degrees, 22.5 degrees, 31.6 degrees and 45 degrees to both the left and the right.
Lasers or guide lights are another nice feature to look for. These cast a laser beam or shadow across the board so that you can guide your cuts more precisely. Digital displays are another nice feature because they provide accurate bevel and miter angle information.
Things You Should Look For In Miter Saws
There are several things that you should look for in a miter saw. One of them is that the blade and arm can be easily adjusted and securely locked into place. In addition, some saws are easier to adjust than others. Some will go right where you want them to, and others you will have to play with a bit to get them exactly right.
The stand and mounting system should be stable and secure when cutting.
Safety Equipment
The most important features of a miter saw are its safety features. It does not take much to imagine the worst that could happen. Of course, you should never buy or use a saw where the guards are not in place or do not work properly. It is easy for the wood to buck or slip, causing the potential for serious injury.
Operator error are the most common causes of injury using miter saws. Prior to using any miter saw, the operator should perform an inspection. This check should include:
- Checking the blade to make sure that it is straight and that the bolt is tight
- Checking electrical cords to ensure that they are not frayed and are secure
- Checking to make certain that all guards are in place and working properly
- Checking the work done for tripping hazards
- Making sure that the platform is stable and does not wobble
In addition, you should always wear proper eye protection and where appropriate clothing around saws. Electric brakes are an important safety feature because they reversed the flow of electricity to the motor and allow you to stop the blade quicker than saws without this feature. Safety should always be the first thing on every miter saw operator’s mind.
Conclusion
Now, you have an idea about the basic idea about the types of miter saws and some of the features. Miter saws come with a wide range of capabilities and at a wide range of prices. When choosing a miter saw, the most important consideration is the type of work that you will be doing and how often you think that you will use it. Whether you are a hobbyist or a professional woodworker, you can easily find a model that suits your needs.
We thought the Dewalt DW715 was the best overall pick. Even though it is only a single bevel and not as feature-rich, its performance allowed it to make precise cuts. It was easy to adjust, and we felt that it would suit the needs of most woodworkers.
There are many other miter saws on the market, but this review features that ones that we felt were the best of the best. If you purchase one of these miter saws, be sure and drop us a line to let us know what you thought.
Top Rated Compound Miter Saws
The post Best Miter Saws 2018 – Reviews and Buyer’s Guide appeared first on Woodworking Wiki.
 When it comes to fixing minor imperfections in woodworking or wood finishing around the house, it can be common to use a non-wood putty or filler to do the job. It might not be the best solution for fine woodworking where the end product is also seen as a work of art, but for those of us who need to hide minor inconsistencies in the wood project, these materials are life savers.


 Amazon.com
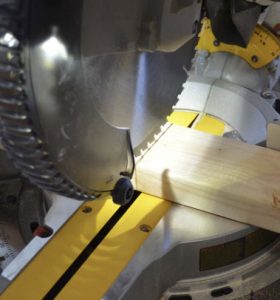 Dewalt design this model with a LED light that is ultra-bright. You will find the LED light on the XPS cross-cut alignment system. The purpose of this is to cast the shadow of the saw’s mitre blade onto the work surface. In this way, you will be able to precisely see where the blade is going to cut.